Table of Contents
- Step 1: Identify Noise Sources and Measure Exposure Levels
- Step 2: Conduct Manufacturing Noise Exposure Assessment
- Step 3: Apply Noise Control in Manufacturing Using the Source-Path-Receiver Framework
- Step 4: Establish Hearing Conservation Program Requirements
- Step 5: Select and Issue Hearing Protection Equipment
- Step 6: Monitor and Verify Control Effectiveness Using a Noise Dosimeter for Workplace Monitoring
- Step 7: Maintain Records and Review Your Program
- Common Mistakes to Avoid
- Frequently Asked Questions
Last Updated: October 19, 2026
Step 1: Identify Noise Sources and Measure Exposure Levels
Understanding how to manage noise exposure in manufacturing starts with walking the plant, documenting where sound comes from, and measuring the levels workers actually face.
Common sources in manufacturing environments
Noise comes from machinery, compressed air systems, impact tools, and material handling. Presses, grinders, stamping equipment, pneumatic drills, sanders, and chippers generate high levels; forklifts, conveyors, and material dropping onto hard surfaces raise the overall noise floor.
The key is identifying which sources matter most:
- Continuous noise from running machinery
- Impact noise from presses or hammers
- Compressed air leaks and venting
Document each source’s location and whether workers stand near it all day or pass through occasionally.
Using a sound level meter to assess baseline conditions
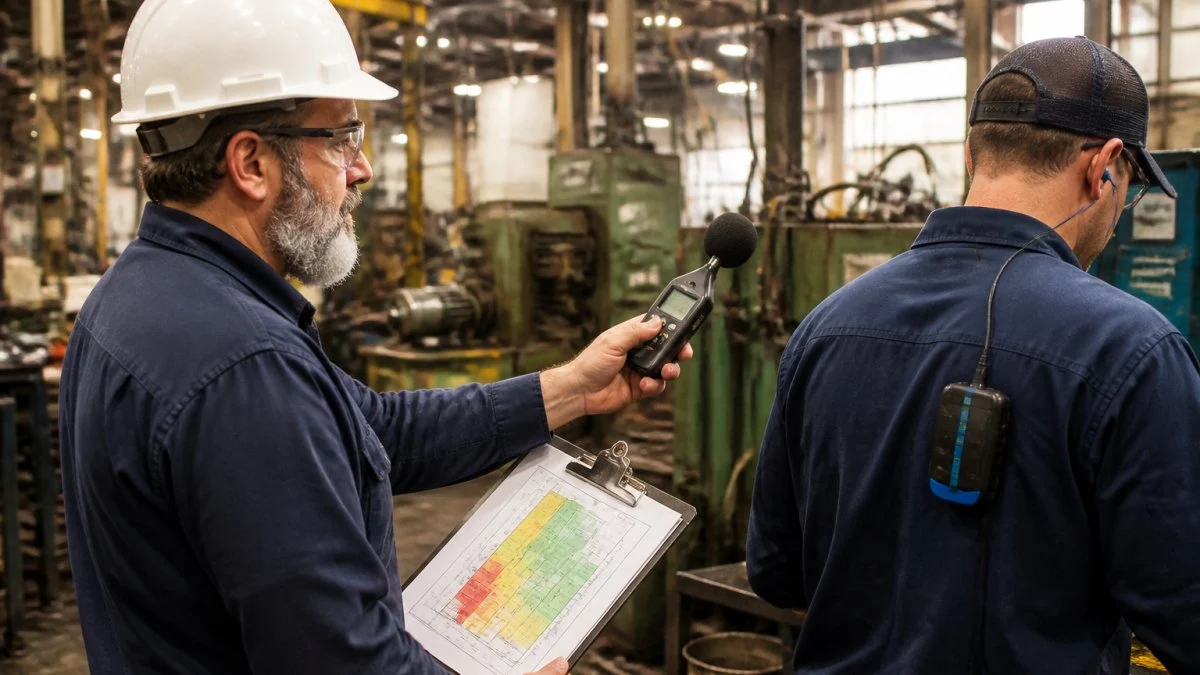
A sound level meter measures noise in decibels and establishes the baseline. Take readings at worker positions during normal operations, at ear height, multiple times per shift, and record the time, location, equipment running, and tasks performed.
Step 2: Conduct Manufacturing Noise Exposure Assessment
Once you know where noise comes from, measure full-shift exposure and compare it to the OSHA thresholds that trigger action.
Choosing between a sound level meter and a personal dosimeter
The two instruments answer different questions, and most assessments need both.
A sound level meter gives an instantaneous reading at a location.
A personal noise dosimeter is worn near the ear and logs a time-weighted average over the whole shift.
A practical rule: meter first to map the floor, then dosimeter the roles that look borderline or variable.
Applying the OSHA exposure thresholds
OSHA’s noise standard sets two numbers that drive every downstream decision:
- Action level: 85 dBA as an 8-hour TWA. At or above this, a hearing conservation program is required, audiometric testing, training, hearing protection made available, and recordkeeping.
- Permissible exposure limit: 90 dBA as an 8-hour TWA. At or above this, feasible engineering or administrative controls must be implemented, and hearing protection is required.
OSHA also uses a 5 dB exchange rate: every 5 dBA increase halves the allowable exposure time, 95 dBA is limited to 4 hours, 100 dBA to 2 hours.
Record each result as an 8-hour TWA so it can be compared directly to 85 and 90 dBA.
Documenting worker locations and exposure duration
Track where each worker spends time during a shift. For each worker or job role, document location and a map reference, hours in each area, equipment worked with or near, periods outside the noise area including breaks and lunch, and tasks producing impact noise that dosimeters may under-represent if not set correctly.
Recording results and establishing baseline data
Record all measurements and observations: dates, times, locations, instrument make and model, calibration checks before and after, conditions, equipment running, and workers present. This baseline is your comparison point, after controls are implemented, measure again to prove exposure dropped. Keep noise exposure measurement records at least two years under OSHA recordkeeping rules, and audiometric records for the duration of employment plus the required retention period.
Calibrate the meter or dosimeter with an acoustic calibrator before and after every measurement session, and log the calibration reading. An uncalibrated reading is hard to defend and easy to challenge.
Turning measurements into control decisions
Measurements are only useful if they point to an action:
- Below 85 dBA TWA: no hearing conservation program required, but re-check if equipment or processes change.
- 85 to 89 dBA TWA: hearing conservation program required, protection made available, audiometric testing, training, annual re-evaluation. Engineering controls are not yet mandatory but worth pursuing where feasible.
- 90 dBA TWA or above: hearing protection required, and feasible engineering or administrative controls must be implemented. Document why any control is not feasible if you rely on protection alone.
Map results back to the floor. If three workstations drive most of the dose, target them first for enclosures, isolation, or equipment replacement.
Step 3: Apply Noise Control in Manufacturing Using the Source-Path-Receiver Framework
The most effective approach to managing noise exposure in manufacturing uses three strategies: control noise at the source, interrupt the path it travels, or protect the worker who receives it.
Engineering controls at the source
The best solution is to make the equipment quieter. Maintain equipment properly, lubricate moving parts, and fix loose guards and covers, a well-maintained machine is usually quieter than a neglected one. Equipment changes that require investment include replacing impact tools with quieter hydraulic versions, upgrading to low-noise compressors, installing vibration isolation on machinery, and using elastomer pads under equipment.
Isolating the path and using barriers
Sound travels through air; block the path and you reduce exposure. Acoustic enclosures around loud machinery work well, and sound-absorbing panels on walls and ceilings reduce reflection and echo. Barriers don’t have to be expensive: movable acoustic panels, heavy curtains or blankets on frames, partial enclosures that allow maintenance access, and distance.
Protecting the receiver with work practices
Administrative controls change how work happens: rotate workers between loud and quiet tasks, limit continuous exposure in high-noise areas, schedule maintenance during breaks or low-production periods, use hand tools instead of power tools when feasible, and keep doors closed on high-noise areas.
Step 4: Establish Hearing Conservation Program Requirements
A hearing conservation program protects workers and documents compliance. Start with baseline audiometric testing before a worker begins a noise-exposed job, then annual follow-up testing to track hearing over time, if it worsens, your controls need adjustment. Training covers why protection matters and how to use it correctly; noise exposure is cumulative.
Step 5: Select and Issue Hearing Protection Equipment
Hearing protection is your last line of defense when engineering and administrative controls don’t fully reduce exposure. The right equipment, properly fitted and worn, prevents hearing damage. The wrong equipment, or the right equipment worn wrong, gives a false sense of protection and a compliance problem.
Reading the Noise Reduction Rating correctly
Every hearing protector sold in the U.S. carries a Noise Reduction Rating (NRR) in decibels. The NRR is a laboratory number that overstates real-world protection, so OSHA’s guidance is to derate it:
- Earmuffs: subtract 25% from the manufacturer’s NRR
- Formable foam earplugs: subtract 50% from the NRR
- All other earplugs (pre-molded, custom-molded, canal caps): subtract 70% from the NRR
Example: a foam earplug rated NRR 33 derated by 50% gives about 16.5 dB of assumed protection; an earmuff rated NRR 25 derated by 25% gives about 18.75 dB. Compare that derated number against the measured TWA, not the meter reading. A worker with a 98 dBA 8-hour TWA and 16.5 dB derated protection sits at about 81.5 dBA, under the 85 dBA action level.
Matching protectors to the exposure level
Use the derated NRR to select, not the label number:
- Moderate noise (roughly 85-95 dBA TWA): earplugs are usually sufficient and more comfortable for long wear.
- High noise (roughly 95-100 dBA TWA): earmuffs or high-attenuation plugs; muffs are easier to don, doff, and check visually.
- Very high noise (above 100 dBA TWA): double protection, plugs under muffs. Do not add the two NRRs; combined protection is limited and should be estimated conservatively.
Over-protection is a real problem. A worker isolated from speech and warning signals may remove protection to communicate or hear a machine alarm. Select the lowest attenuation that brings protected exposure comfortably below 85 dBA, not the highest number on the shelf.
Fit checking and worker training
Fit is where most hearing protection programs fail, a foam plug not rolled and inserted deeply enough may provide a fraction of its rated attenuation. Teach and verify a simple fit check:
- Earplug fit check: with the plug in place, cup your hands over your ears and release. If the sound level changes noticeably, the plug is not sealing. Reinsert.
- Earmuff fit check: the cushion should seal against the head with no gaps from hair, safety glasses temples, or headgear. A broken seal can drop attenuation dramatically.
Have each worker demonstrate insertion and the fit check before working in noise, re-check at training intervals, and document who was trained and when.
Safety glasses with thick temples can break the seal on earmuffs. If workers must wear both, choose muffs designed to work with eyewear or switch to earplugs.
Comfort, communication, and compliance
Workers wear what fits and what they can tolerate for a full shift. Offer multiple earplug sizes and styles (foam, pre-molded, banded), earmuffs with different cushion types and headband tension, and custom-molded plugs for workers who struggle with fit or comfort. Where workers need to hear each other or hear alarms, consider communication-enabled earmuffs or level-dependent protectors that pass speech while attenuating impact noise.
Issue, replacement, and inventory
Issue protection to every worker in noise-exposed areas and keep it available, not locked in a cabinet. Set a replacement schedule: foam plugs when soiled, torn, or no longer compressible; pre-molded and custom plugs per manufacturer guidance or when damaged; earmuff cushions when compressed, cracked, or hardened, and headbands when tension is lost.
Documenting the selection decision
For each noise-exposed role, record the measured TWA, the protector issued, the derated NRR, and the resulting protected exposure estimate.
At McNeil Safety Consulting, we help manufacturing companies build hearing conservation programs that hold up, from exposure assessment and protector selection through fit training and documentation.
Step 6: Monitor and Verify Control Effectiveness Using a Noise Dosimeter for Workplace Monitoring
A noise dosimeter measures actual worker exposure over a full shift, recording cumulative noise dose. Unlike a sound level meter’s one-moment snapshot, it accounts for both noise level and time spent in noise. Use it to confirm controls reduced exposure as expected, identify workers still over-exposed, verify work rotations actually reduce dose, detect equipment changes that increased noise, and support program documentation.
Periodic reassessment and trending exposure data
Measure exposure again every year or two, equipment ages, production changes, workers move to different jobs. Track data year to year: if exposure creeps up, find out why; if stable or dropping, your program is working. Trending data also shows regulators you actively monitor and adjust, which matters in enforcement actions.
Documenting maintenance and control updates
Keep records of all maintenance and control improvements, when you replaced equipment, installed barriers, or changed work practices. Reference these records in follow-up monitoring to show a deliberate, documented approach to how to manage noise exposure in manufacturing.
Step 7: Maintain Records and Review Your Program
Documentation is critical. Keep records of measurements, training, fit testing, audiometric results, and control improvements, they demonstrate your program to regulators and protect your company if compliance is questioned.
At McNeil Safety Consulting, we help manufacturing companies develop and implement noise exposure management programs that actually work.
Common Mistakes to Avoid
Many manufacturers take shortcuts that weaken their program. Avoid these common errors.
Ignoring maintenance. A loose guard or worn bearing makes noise worse.
Buying cheap protection. Low-cost earplugs often don’t seal well; buy quality workers will actually use.
Measuring once and assuming you’re done. Conditions change, measure again periodically.
If you need help assessing noise exposure or designing a hearing conservation program, contact McNeil Safety Consulting. We conduct industrial hygiene assessments, design control strategies, and support compliance across California and the Western US.
Frequently Asked Questions
How do you assess noise exposure in a manufacturing facility?
Start by identifying all machinery and processes that generate noise. Use a sound level meter to measure decibel levels at worker positions during typical operations. Record exposure duration for each employee and calculate time-weighted averages. Document the location, equipment, and conditions. This baseline assessment determines whether controls are needed and which workers require hearing conservation program enrollment. Professional exposure assessment ensures accuracy and regulatory compliance.
What should be included in a manufacturing noise exposure assessment?
A comprehensive assessment documents the noise source, sound pressure levels in decibels, worker proximity and exposure duration, existing controls, and affected job roles. Include measurements at different times and conditions to capture typical and peak exposures. Record equipment maintenance history, as worn machinery often produces higher noise levels. Assess whether administrative controls like job rotation or work schedules affect total exposure. This data guides control selection and establishes whether a formal hearing conservation program is required.
What are the most effective ways to reduce noise in a manufacturing facility?
The source-path-receiver framework prioritizes controls. At the source, select quieter equipment, maintain machinery to reduce vibration, and use low-noise processes. Along the path, install acoustic barriers, enclosures, or sound-absorbing materials around equipment. At the receiver level, rotate workers away from high-noise areas and issue properly fitted hearing protection. Engineering controls are most effective; administrative changes and hearing protection are secondary. Combining methods across all three levels delivers the best results and reduces reliance on personal protective equipment alone.
When is a hearing conservation program required, and what does it include?
A hearing conservation program is required when employees are exposed to noise at or above the action level during an 8-hour workday. The program must include baseline and annual audiometric testing, employee training on hearing protection and noise hazards, access to hearing protection devices, and recordkeeping of test results. Workers must receive fit testing for earplugs or earmuffs to ensure proper seal and protection. The program also requires periodic reassessment of workplace noise levels and review of audiometric trends to detect early hearing loss.