
Last Updated: October 22, 2026
Quick Summary
Identifying potential sources of accident or injury is the process of finding unsafe conditions, unsafe acts, and organizational factors before an incident occurs. It works as a repeatable loop: inspect the workplace, analyze tasks, collect hazard examples, rank risks, assign corrective actions, and verify the fixes held.
- Build inspection checklists around equipment, environment, chemical storage, energy sources, and ergonomic setup, not tidiness.
- Rotate inspectors so fresh eyes catch what routine stops seeing.
- Run a job hazard analysis with the worker performing the task, not for them.
- Log every near miss in one place with consistent fields and review records monthly for repeats.
- Verify controls where they are weakest, such as night shifts, temporary crews, and peak production pushes.
Table of Contents
- Why Identifying Potential Sources of Accident or Injury Comes Before the Incident
- Step 1: Build a Workplace Safety Inspection Checklist That Finds Hazards, Not Just Housekeeping
- Step 2: Walk the Job Through a Job Hazard Analysis
- Step 3: Collect Hazard Identification Examples From Your Own Operation
- Step 4: Turn Near-Miss Reporting Into a Source-of-Injury Database
- Step 5: Rank Hazards by Risk and Assign Corrective Action
- Step 6: Verify Follow-Up and Prevent Recurrence
- Tools, Records, and Training That Keep the Process of Identifying Potential Sources of Accident or Injury Alive
- Frequently Asked Questions
Why Identifying Potential Sources of Accident or Injury Comes Before the Incident
Most safety programs are built to react.
Every workplace injury has an initiating event that was visible beforehand: an unsafe condition nobody logged, an unsafe act nobody corrected, or an organizational factor nobody questioned.
Finding those sources early is cheaper than investigating a workplace injury later and keeps records clean when a regulator arrives.
Below, we break the process into six repeatable steps. Each one feeds the next.
Hazard identification is not a form you fill out. It is a loop: inspect, analyze, report, rank, fix, verify. Break the loop and hazards go quiet until they hurt someone.
Step 1: Build a Workplace Safety Inspection Checklist That Finds Hazards, Not Just Housekeeping
A workplace safety inspection checklist should target unsafe conditions by category, not tidiness.
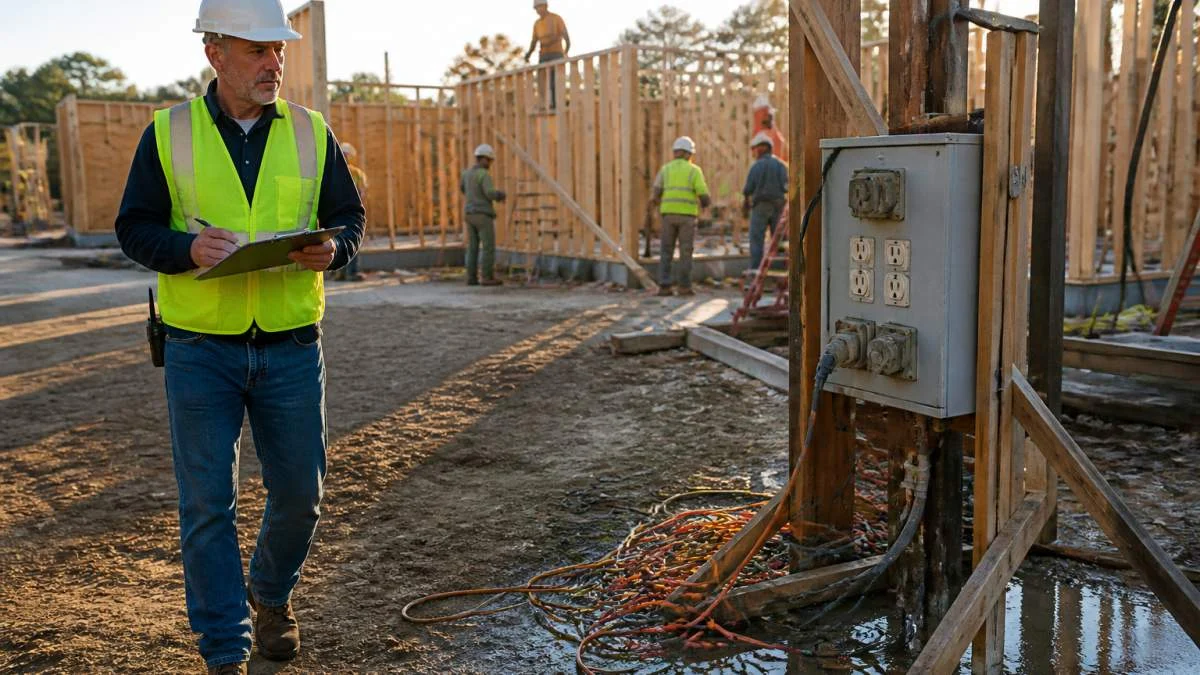
Build yours around the things that actually injure people:
- Equipment condition: guards missing, cords damaged, lockout points accessible
- Work environment: lighting, ventilation, noise, walking surfaces, egress paths
- Chemical and material storage: labeling, containment, incompatible storage
Walk the job and mark each item pass, fail, or not observed. “Not observed” tells you where your inspection is blind.
A common mistake is letting the same person inspect the same area every month. Rotate inspectors. Fresh eyes catch what routine stops seeing.
Step 2: Walk the Job Through a Job Hazard Analysis
A job hazard analysis breaks a task into steps and names the hazard in each one.
The method is straightforward:
- Pick a task with injury history or high severity potential
- Break it into sequential steps
- List the potential hazard at each step
- Rate each hazard’s severity and likelihood
- Write the control for each step before the next walk
The OSHA guidance on job hazard analysis walks through this structure and is worth keeping on hand.
Workers describe tasks the way they actually do them, rarely the way the written procedure says. That gap is itself a hazard identification example.
Step 3: Collect Hazard Identification Examples From Your Own Operation
Generic hazard lists are useful for training, but your own operation’s examples change behavior. Collect them systematically instead of waiting for them to arrive as injuries.
Collect from four streams, and label the source on every entry so you can see which stream is producing the most useful data:
- Inspections: conditions found on the walk, with the checklist item that caught them
- Near misses and no-injury events: the events that almost hurt someone
- Worker reports: the informal observations that never make it to a form unless you ask
Separate the Source of Injury From the Symptom
A hazard log fills up with symptoms: a wet floor, a missing guard, a shortcut. Those are real, but they are the visible end of a chain.
Write each entry as a short causal chain: condition observed, what it could cause, and what produced it. That forces analysis at collection instead of months later when memory has faded.
Screen Every Example for Human and Organizational Factors
Worker error is rarely the whole story. Before closing an entry as “employee failed to follow procedure,” run it through these questions:
- Fatigue and scheduling: was the worker on an extended shift, a rotating schedule, or a second job?
- Training and qualification: was the task within the worker’s training, and was the training current?
- Workload and staffing: was the task staffed for the pace it was performed at?
A common pattern is a procedure that is technically correct but practically unusable, so workers develop a workaround. It becomes normal, then invisible, then an injury. Treating the workaround as the cause misses the design problem behind it.
Sort Into Three Buckets, Then Push One Level Deeper
Sort every example into three buckets:
- Unsafe condition: the physical state of the workplace, such as a damaged ladder or blocked exit
- Unsafe act: what a person did, such as bypassing a guard or skipping lockout
- Organizational factor: the pressure or gap that produced the act, such as schedule pressure, unclear procedure, or missing training
That third bucket is the one most programs skip. It is also where recurrence prevention lives. A worker who bypasses a guard because production targets make the safe method slower is responding to an organizational factor, not a personal failing.
If your hazard log only records unsafe acts, you will keep writing up the same workers for the same behavior. The underlying cause stays in place, and the hazard returns as soon as the write-up is forgotten.
Build a Hazard Map From the Examples
Once you have a few dozen entries, plot them on a floor plan by location and task. Patterns invisible in a list become obvious on a map: the same aisle, the same machine, the same shift handoff. Update it each cycle and keep the previous version to see whether hazards are migrating or resolving.
Involve the Workers Who Do the Task
Examples collected only by supervisors reflect what supervisors can see. Workers know the workarounds, the unreported near misses, and the conditions that only appear on certain shifts. Ask in the work area about the last time the task felt unsafe rather than whether it is safe. The second question gets a yes; the first gets a story, and the story is the data.
Step 4: Turn Near-Miss Reporting Into a Source-of-Injury Database
Near-miss reporting is the cheapest source of hazard data a workplace has. A near miss is an event that could have caused injury but did not.
Make reporting easy and blameless. Then log every report in one place with consistent fields:
| Field | What to Record |
|---|---|
| Date and location | When and where the event occurred |
| Activity | Task being performed at the time |
| Potential hazard | The source of injury that almost caused harm |
| Sequence of events | What happened, in order |
| Contributing factor | Condition, act, or organizational cause |
| Immediate action | What was done on the spot |
| Follow-up owner | Who closes the loop and by when |
The table is the database. Fill every field or the record cannot support pattern analysis.
Review near-miss records monthly and look for repeats. Three reports of the same slip hazard in one aisle is a hazard assessment finding, not three unlucky days.
Step 5: Rank Hazards by Risk and Assign Corrective Action
Not every hazard gets fixed at once. Rank by severity and likelihood so resources go where injury risk is highest.
A simple matrix works:
- High severity, high likelihood: stop work and control immediately
- High severity, low likelihood: schedule a control and add interim protection
- Low severity, high likelihood: correct through routine maintenance or procedure change
Assign one named owner and a target date to every corrective action. An unassigned action is a wish.
The NIOSH hierarchy of controls should guide what control you choose. Elimination and engineering controls beat administrative rules and PPE every time.
Step 6: Verify Follow-Up and Prevent Recurrence
Corrective action is not complete when the work order closes. It is complete when a follow-up check confirms the hazard is gone, the control is being used, and the risk has dropped. Most programs stop at the work order, which is why the same hazards reappear.
Close the Loop With an Effectiveness Check, Not a Status Update
A status update tells you the work was done; an effectiveness check tells you whether it worked. Build the check into the corrective action when you assign it, so the person who owns the fix also owns the proof.
For every corrective action, record:
- The hazard and its source: what was found and what produced it
- The control chosen: what was changed, and where it sits on the hierarchy of controls
- The named owner: one person, not a department
An action without a named owner and a date is a wish. An action without a verification method is a hope.
Verify in Three Dimensions
A single walk-by is not verification. Check the control from three angles:
- Physical check: return to the location and confirm the control is installed, intact, and in the condition it was designed for. A guard that was reinstalled but is now loose has not been controlled.
- Record check: confirm the hazard log shows the closure with a date, a name, and the verification result. If the record is incomplete, the closure is not real.
- Behavior check: observe the task being performed and confirm workers are using the new control. A control that workers route around is not a control; it is a suggestion.
Test the Control Where It Is Weakest
Controls fail at the edges: the night shift, the weekend crew, the temporary worker, the contractor, the peak production push. Schedule verification where the control is most likely to break, not where it is easiest to confirm. If the fix was made on day shift, verify on nights; if for permanent employees, verify with the temporary crew.
Measure Whether Risk Actually Dropped
Closing an action is an activity metric. Reducing risk is the outcome. Pick one or two measures per corrective action and check them at the verification date:
- Repeat findings: has the same hazard been logged again since the fix?
- Near-miss reports: have reports tied to the same task or location gone down, stayed flat, or gone up?
- Behavior observation: are workers using the control without prompting?
A rise in near-miss reports after a fix is not necessarily a failure. It can mean workers now trust the reporting system enough to use it. Look at the content of the reports, not just the count.
Reopen What Did Not Hold
If the hazard reappears, the root cause was never addressed. Reopen the action, return to the causal chain you wrote at collection, and ask what the first fix missed. Document the reopening and second analysis; the pattern across reopenings is often your most useful data.
Schedule the verification inspection for a different shift than the one that reported the hazard. Controls that work on day shift sometimes fail on nights, and the only way to know is to look.
Feed Verification Back Into the Loop
Verification is not the end of the process; it is the input to the next cycle. Every result should update the hazard map, the inspection checklist, and the training content. A control that worked becomes a checklist item; one that failed becomes a case example in the next training session. That feedback turns a one-time fix into a program that gets harder to injure people in over time.
Tools, Records, and Training That Keep the Process of Identifying Potential Sources of Accident or Injury Alive
The process of identifying potential sources of accident or injury dies without maintenance. Keep it alive with a small, durable toolkit.
- Investigation kit: camera, tape measure, barrier tape, gloves, sample bags, and blank report forms, kept stocked and accessible
- Hazard map: a floor plan marked with known hazard locations, updated after every inspection
- Incident records: one log for near misses, first aid cases, and workplace injuries, reviewed monthly
Review the whole system at least annually. Update the checklist when equipment changes. Retrain when a new task appears.
McNeil Safety Consulting builds these systems for employers across California and the Western US, including IIPP writing, hazard assessments, and industrial hygiene exposure monitoring when the hazard is invisible.
When a serious injury or fatality does occur, our workplace incident investigation work picks up where prevention failed and documents the sequence of events for regulators and insurers.
Frequently Asked Questions
What are the root causes of incidents?
Root causes are the underlying conditions that allowed an incident to happen, as distinct from the immediate cause such as a slip or a dropped tool. Investigators usually sort them into unsafe conditions, unsafe acts, and organizational factors like production pressure, unclear procedures, or gaps in training and supervision. A single incident often has several contributing causes. Naming them all, rather than stopping at the first obvious one, is what makes corrective action stick and keeps the same source of injury from producing a second event.
What is the difference between hazard identification and incident investigation?
Hazard identification is proactive: you inspect the workplace, run a job hazard analysis, and review near-miss reports to find potential sources of accident or injury before anyone is hurt. Incident investigation is reactive: it starts after an event and reconstructs the sequence of events, evidence, and causes. The two share tools, including the same inspection checklist and the same root cause questions, but only hazard identification gives you the chance to remove the exposure first. Mature safety programs treat near-miss reporting as the bridge between them.
How often should workplace hazards be reviewed?
Review hazards whenever something changes: new equipment, a new process, a shift in staffing, or a reported near miss. Beyond that, schedule a formal review at least annually and inspect higher-risk areas more often, such as weekly or monthly depending on the exposure. Each review should update the workplace safety inspection checklist and the job hazard analysis so the documents reflect current conditions, not last year’s layout. Records from every review belong in the incident records file so you can show a consistent, documented process.
How can employees identify hazards before an injury occurs?
Give employees a simple way to report what they see. A near-miss reporting form, a short daily walkthrough, and a habit of pausing before non-routine tasks all surface potential sources of accident or injury early. Train workers to describe the condition and the task, not just to say something felt unsafe. Supervisors should acknowledge each report and close the loop on corrective action, because a reporting channel that never produces visible change stops producing reports.
Prevention only works if the loop actually closes. If your hazard log is stale, your near-miss reports go nowhere, or your last inspection found nothing but housekeeping, the system has quietly stopped working. McNeil Safety Consulting can rebuild it with you, from the inspection checklist through corrective action verification, and handle the industrial hygiene monitoring and IIPP updates that keep it current. Contact McNeil Safety Consulting or call (626) 546-9384 to request a consultation.